Полная версия:
Gardens and Parks

Dedication
For my niece Rowan and the many adventures we are yet to have.
Contents
Cover
Title Page
Dedication
Your local patch
Handy stuff for exploring with
Our feathered friends
It’s a two-way relationship
Nutty feeders
A bird in the hand . . .
Making a simple bird table
Make a deluxe bird bath
Make a nest box
Positioning your nest box
Make a rain guage
Fluff and stuff for nest building
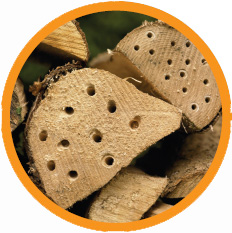
Homes and holes
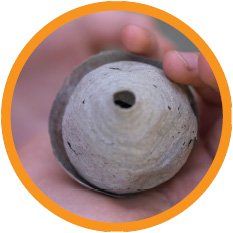
Make a bumblebee box
The ‘embryo’ nest
Nice pile for the wildlife
Homes for the hairy
Make a hedgehog happy
Mammal observation box
Who’s living at the end of your garden?
Bugs and creepy crawlies
Butterfly baiting
Butterfly bar
The shape shifters
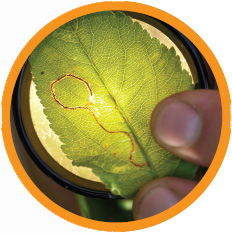
Little leaf lovers
Suckers for the sweet stuff
Beguiled by bulbs
Plant bugs
The ‘wig’ trap
Rulers of the patio
Handy stuff: bottle trap
Worm world
Webbed wonder
Going further
Index
Author’s Acknowledgements
Copyright
Keep Reading
About the Publisher
Your local patch
There is no place like home. You may not think of looking for adventure among the patio tubs, behind the woodpile or even in the potting shed or window box, but it is there in abundance. The trick is to change your perspective on life, look at things from a different place and in a new way.
You may feel there is no interesting wildlife for hundreds of miles, but change your scale a bit and you can be running with predators every bit as ferocious as a lion or tiger. You can stalk creatures as exotic and alien in their appearance as any bird of paradise and witness phenomena that would boggle the mind of even the most world-weary scientist – all within a few metres of where you are sitting right now!
You don’t believe me? Get out there and look. This book is about giving you wings to explore this seemingly familiar environment. Within these pages I give away little tips and tricks that make the natural world reveal itself in amazing ways. The pages are peppered with suggestions of things to look out for and – of course – some of the easier ways to interact with wildlife and make your own patch more attractive to the small creatures that live in your garden, window box or patio.
The basic requirements of life include somewhere to live and preferably with the other essentials to fuel and nourish: namely food and water. Even if you live somewhere that seems like a concrete desert, get down and look into the cracks and crevices and here you will find all the essentials for life. You just might be surprised as to what is living close to your own home. Look at a crack in a patio; this is shelter for something very small as, in here, there will be moisture and warmth.
You can also create homes and provide food and water to boost the number of species sharing your space; these ideas and more are explored within the pages of this book. Remember, though, this is not a comprehensive guide, so have fun, experiment and think about other ways you can encourage and study the wildlife around you.
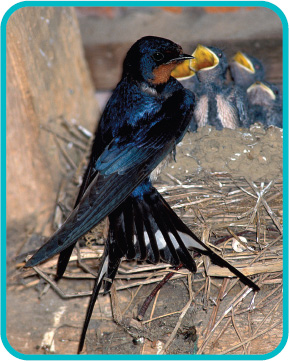
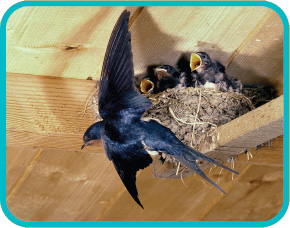
Home Sweet Home – you may be lucky enough to have swallows nesting under your eaves.
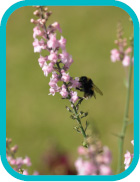
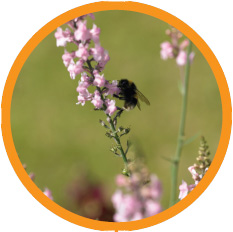
All flowers lure insects; from bees and hoverflies to butterflies, they all add interest to your garden.
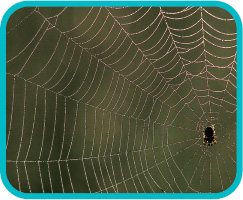
Where you have flying insects, you will also start attracting those that feed on them – birds, bats and, of course, spiders.
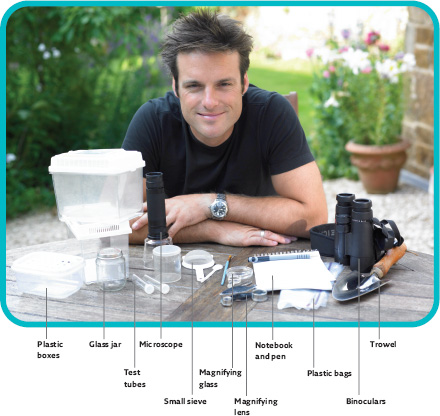
Handy stuff for exploring with

What kit you will need to explore your garden or park with very much depends on what your patch is like. If you have a little back yard in the city with hardly enough space to swing a net, you will explore it differently to someone who has a mountain in theirs. Having said this, there is interest to be found in any garden from an estate to a window box, and so here are a few bits of kit that I would find useful when exploring.
Binoculars These are always very useful, especially if you want to watch the details of the lives of birds and other insects without disturbing them. A pair of binoculars may be quite expensive to buy, but they are invaluable to a serious naturalist.
Magnifying glass/pocket microscope Most things you can make or improvise with, but a hand lens is an essential bit of kit. It needn’t be expensive and you can pick one up for pocket money. If you want to turn greenfly into monsters, though, you may need a pocket microscope. This is a bit more expensive, but worth every penny and still a fraction of the price of a Playstation!
Notebook and pen/pencil Another one of those naturalist’s staples, it’s always good to make notes, keep diaries and draw the things you notice. It is something all the great naturalists from Darwin to Bill Oddie have done. It is surprising just how much and quickly we forget details.
Plastic pots and jars These are a staple of any naturalist anywhere; handy for storing specimens, rearing insects or simply holding onto something while you inspect it with a magnifying glass. Plastic bags can do a similar job and you can keep a handful in your pocket at any time. They are useful for storing botanical plants and, if you blow them up and tie the tops with string, you can make temporary containers from them.
Sieves You may be surprised, but meshed scooping devices from sieves to tea strainers can make very handy little catching devices! They can be used like a net in water or modified into a pair of bug-catching tongs. Use larger sieves to sift through soil to find small creatures and moth pupae.
Trowel I find this handy for investigating the soil, exhuming worms and, of course, for re-digging any footprints you might leave on your parents’ flower beds. It’s always a good idea not to upset those garden proud grown-ups.
Take my advice
* Because this book is about attracting things to your garden and providing homes and feeding stations, there is obviously plenty of creating to be done. This means there are sections and activities that involve hammers, nails, screws and even the odd drill and other power tools. These things can be a little tricky to use and can be dangerous.
* So before you start any of the projects, let a grown-up know what you are up to and, if you are using specialist tools, ask for help.
Our feathered friends
Birds are everywhere, and because they are big, they are often the first creatures to catch our attention. They also show us how we can provide for nature in our own back yards. In fact, if it wasn’t for our feathered friends, we wouldn’t be seeing our gardens and parks as wildlife refuges at all. Birds invented wildlife-friendly gardening!

In recent years, watching birds in gardens and being aware of who visits and in what numbers has given us a better understanding of just how bird populations are changing. It also shows how important the wildlife garden can be in supporting many species.
There are many products, catalogues and shops dedicated to encouraging birds into your garden, and once you have gained their interest, the feeling of successfully helping them makes your heart glow. So why stop at birds, why not encourage butterflies and other insects, mammals and reptiles, and amphibians, too?
There is more to encouraging birds into your garden than hanging out a bag of nuts or throwing out some crumbs or stale bacon rind when the generous mood takes you! Birds are feathered ambassadors for what we humans can do for wildlife. Just by nailing together a few planks of wood and providing a variety of food and a source of water, we can make their lives easier. They will return the favour by giving us a little glimpse into their often fascinating lives.
Bird populations in the wild depend mainly on two things: first they need food, and second they need somewhere to live and nest. So if you are to make your local patch of interest to our feathered friends you need to bear these things in mind.
Swallows love to nest on our homes and outhouses. It’s hard to imagine that they come all the way from central and southern Africa every summer just to stick mud together under our eaves!
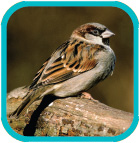
A house sparrow: these chirpy little birds are associated with our homes and buildings but, for some reason, their numbers are declining in their natural range in Europe. Here is a bird we can help by feeding them and providing nest sites.
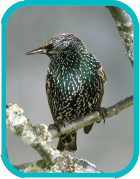
The European starling is a noisy city dweller that gathers in impressively huge flocks in the winter.
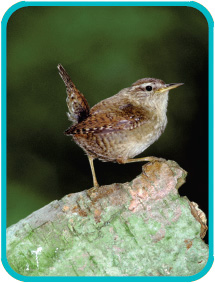
The wren is the king of the singers; a small bird with a loud voice that loves a garden with untidy corners and dense shrubs.
It’s a two-way relationship
Feeding the birds is probably the single most popular way in which people interact with the natural world; from feeding pigeons on the park bench to the bird table in the garden. What you are doing is simply taking on the needs and requirements of the birds.
The ways you can present food to birds is becoming very big business, and by using the right mix and the right feeder in the right place, you can attract birds almost to order! But for now, here’s a low-budget idea to get you going (see opposite).
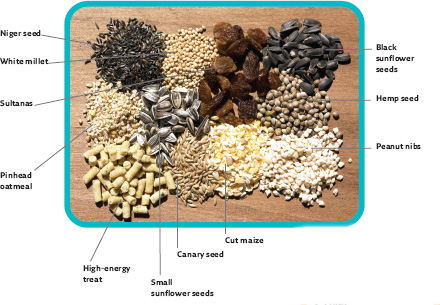
Choose a variety of foods. Not all birds like eating the same things – finches love seeds (niger and sunflower), tits are crazy about nuts, thrushes like fruit and woodpeckers love fatty, suet-based stuff.
YOU WILL NEED
> 1 litre plastic milk carton
> marker pen
> ruler
> scissors
> twigs
> bird seed
> funnel
> string
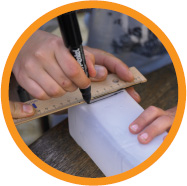
1 Using the marker pen and ruler, draw a line 1.5cm from the bottom of the plastic milk carton and parallel to the base on the opposite side to the handle.

2 With the scissors, cut along the marked line and then, at each end of the incision, cut up about 3cm.

3 Fold the flap you have just created back into the bottle and add a perch or two. Make these from twigs or any straight bits of wood; push them into a hole below the feeding tray.
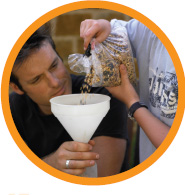
4 Fill with seeds, pouring them into the container through a funnel. Screw the lid back on and then hang up the container with string in your garden.
Take my advice
* Position your feeders carefully. Birds like to be in the open so that predators cannot sneak up on them. But they also like to have cover nearby so that if a sparrow hawk comes cruising around, they can all leap into cover.
* Vary the locations of your feeders, as some birds are bold while others are shy. So feed close to the house by all means, but do not forget the nervous ones and provide food at the end of the garden too.
* Different birds feed in different ways. Some rarely get onto the bird table but prefer to stay on the ground, while others like flat surfaces, and some like to hang.
* Feed only good quality foods. If it’s cheap, it may have lots of wheat in it. Cheaper peanuts may also contain a fungus infection that can kill the birds you are helping.
Nutty feeders
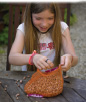
The cheapest nut feeder has to be a plastic mesh bag, the sort that supermarket fruit often comes in. Simply stuff it with peanuts and hang it up. I hate the bright orange of the netting but I have noticed that siskins (one of my favourite birds) show the most interest in these feeders even though they have many others (some of them scarily expensive too) to choose from. This could well become a subject for a garden experiment!
Alternatively, make a full-fat nut pudding. This animal fat-based food is made from warmed animal fat or suet, mixed with any variety of seeds, fruits, nuts or insects and left to set before being served up. It’s a great way of providing a high-energy winter diet for your birds. My favourite way to use the suet reciped is to make fat cones – see opposite – or dip teasel heads into the melted suet.
Another way to provide bird cake is to leave the mix to set in a tin that is wedged in place between three blocks screwed to your bird table. Or you can form a ball and stuff it in a handy plastic fruit net; fill an old coconut shell; or drill holes in a log and jam the fat into these. This last is a real favourite for wood peckers! This recipe is very easy to make and you can fine tune the ingredients, perhaps including some peanuts, sunflower seeds or millet, according to what the birds seem to prefer.
Take my advice
* If you have just started feeding the birds in your garden, it may take them a little while to learn about your new service. So be patient and if after a few weeks there are still no visitors, try relocating your feeding station. It may be that the birds feel just a little too exposed.
* Keep your feeders clean by washing and sterilizing them every few months and try to avoid food hanging around and becoming stale. Feeders over concrete or decking mean you can easily sweep away any spilled food, which may otherwise attract unwanted wildlife such as rats.
YOU WILL NEED
> pine cones
> string
> 250g animal suet
> 1 jar unsalted peanut butter
> plain flour
> bird seed
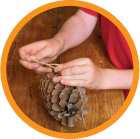
1 Next time you are out for a walk collect old dry pine cones in various sizes. When you get home, tie some string around the base of a few of them.
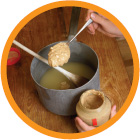
2 Take a saucepan and heat the suet slowly in it until it has melted. Add the peanut butter and mix in until it has melted too.
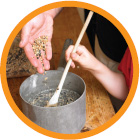
3 Add some flour to help thicken the mixture and then pour in plenty of small fine seeds until you have a fairly stiff mixture. Let it cool a little, continuing to stir.
4 Before the mixture sets, drop your cones into the pan and press the stodge in between the scales.
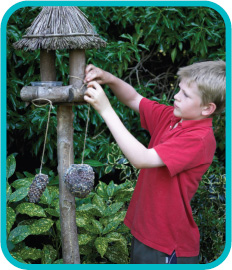
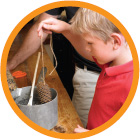
5 Leave to cool and harden and then take out to the garden to hang in a tree or on a bird table.
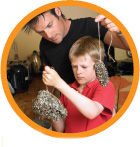
A bird in the hand . . .
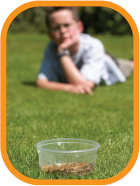
If being close to wildlife is your goal, then it doesn’t get much closer than when it is sitting on your palm. The robin is the perfect candidate for this. Famously bold, you can train your local bird to come to your hand in as little as a week – see opposite for how you do it. If at any stage you fail, go back a step and keep trying for contact. It is worth it for both of you: your robin will get vital food of the right kind, and you will get the rare thrill of touching a wild bird.
Take my advice
* Despite what some people seem to think, you can feed your birds all year round, just be aware that large, dry food items, such as stale bread crusts and peanuts, can choke young nestlings. So in the summer, either place them in a feeder that allows the birds to only take small bits or crumble and crush the food first.
* Also, don’t panic if you have to go away and your feeders run out. The birds are used to having food resources in the wild that do the same thing. They are adaptable and will find food elsewhere until you resume feeding again.
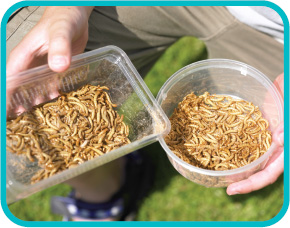
YOU WILL NEED
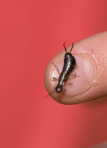
> meal worms
> plastic container
> patience
1 Get your robin interested by catching its eye with a plastic container full of wriggling meal worms. Start by simply placing this tub on your regular bird table. Eventually the robin will start feeding on them.
2 Then slowly, as the days go by, move the meal worm container away from the bird table. First move it to the foot of the bird table . . .
3 . . . then move it into the middle of the lawn. Try standing out in the garden while he is feeding, progressively getting closer to him – a step or two every day. Now you can try offering the meal worm in the same tub but at arm’s length.
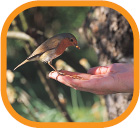
4 Then, when he seems quite relaxed, one day remove the tub and place the wrigglers in your palm. You should now have a hand tame robin!
Nick’s trick
Different robins have I different tolerance levels so there are no rules to how long getting to within arm’s length will take. Just be patient. Keeping low or even lying down all help.
Take it further
Meal worms are the wriggly larvae of various beetles and can be bought in many pet shops, especially those that deal with reptiles and amphibians. They are really easy to culture in a box in your airing cupboard. All you need is a well-ventilated box with a tight-fitting lid; you can feed the worms on oatmeal, bread, biscuits and the like. Feeding meal worms to the birds is a little trickier, though, as the worms thoughtlessly have a tendency to crawl off, something a peanut most definitely cannot do. Overcome this by serving them up in slippery sided containers – but watch out for rain.
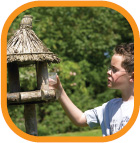
Making a simple bird table
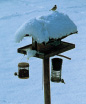
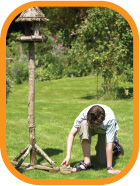
Go to any garden centre and take a look at the bird tables that are available. You can get them with balconies, balustrades, porches, even thatched roofs and chimneys. Some even come with a nest box upstairs! Personally, I think that some of them are just too ornate and in my experience, although they can all work to a greater or lesser degree, they fall short of actually providing what the birds want and need, which is a nice stable, spacious platform that is easy to keep clean.
Bird will eat off pretty much anything and, as with all things to do with wildlife, there are no hard and fast rules, so you can experiment. To get you started, here is a very simple and effective step-by-step project to build a bird table.